
A clear home renovation order of work helps you make thousands of small decisions in the right sequence, so your build feels controlled rather than chaotic. Whether you are upgrading an apartment in Downtown Dubai, refreshing a villa in Jumeirah or renovating a commercial space, the right order protects your budget, reduces rework and helps each trade arrive when the site is actually ready.
Renovation stress rarely comes from one big mistake. It usually comes from small steps happening too early, too late or without the right information. Cabinets are ordered before appliance sizes are confirmed. Tiles arrive before waterproofing is tested. Painters start before electrical points are finalized. A good sequence prevents those clashes.
If you are still defining the full scope, it helps to pair this guide with a broader home renovation checklist for a smooth project before you approve drawings, budgets or timelines.
Why the Renovation Sequence Matters
Every renovation has dependencies. You cannot close walls until electrical and plumbing work is inspected. You should not install flooring before dusty ceiling work is complete. You should not finalize stone countertops before cabinets are fixed, leveled and measured on site.
The sequence also affects cost control. When work happens in the wrong order, trades may need to return, materials can get damaged and finished areas may need to be opened again. In Dubai homes, where building access rules, elevator timings and community guidelines can affect daily progress, a logical schedule is even more valuable.
A good order does not mean there will be no adjustments. Renovations reveal hidden conditions, especially behind old walls, ceilings and floors. But when the work is properly sequenced, surprises are easier to isolate and solve without derailing the entire project.
Home Renovation Order of Work: The Practical Sequence
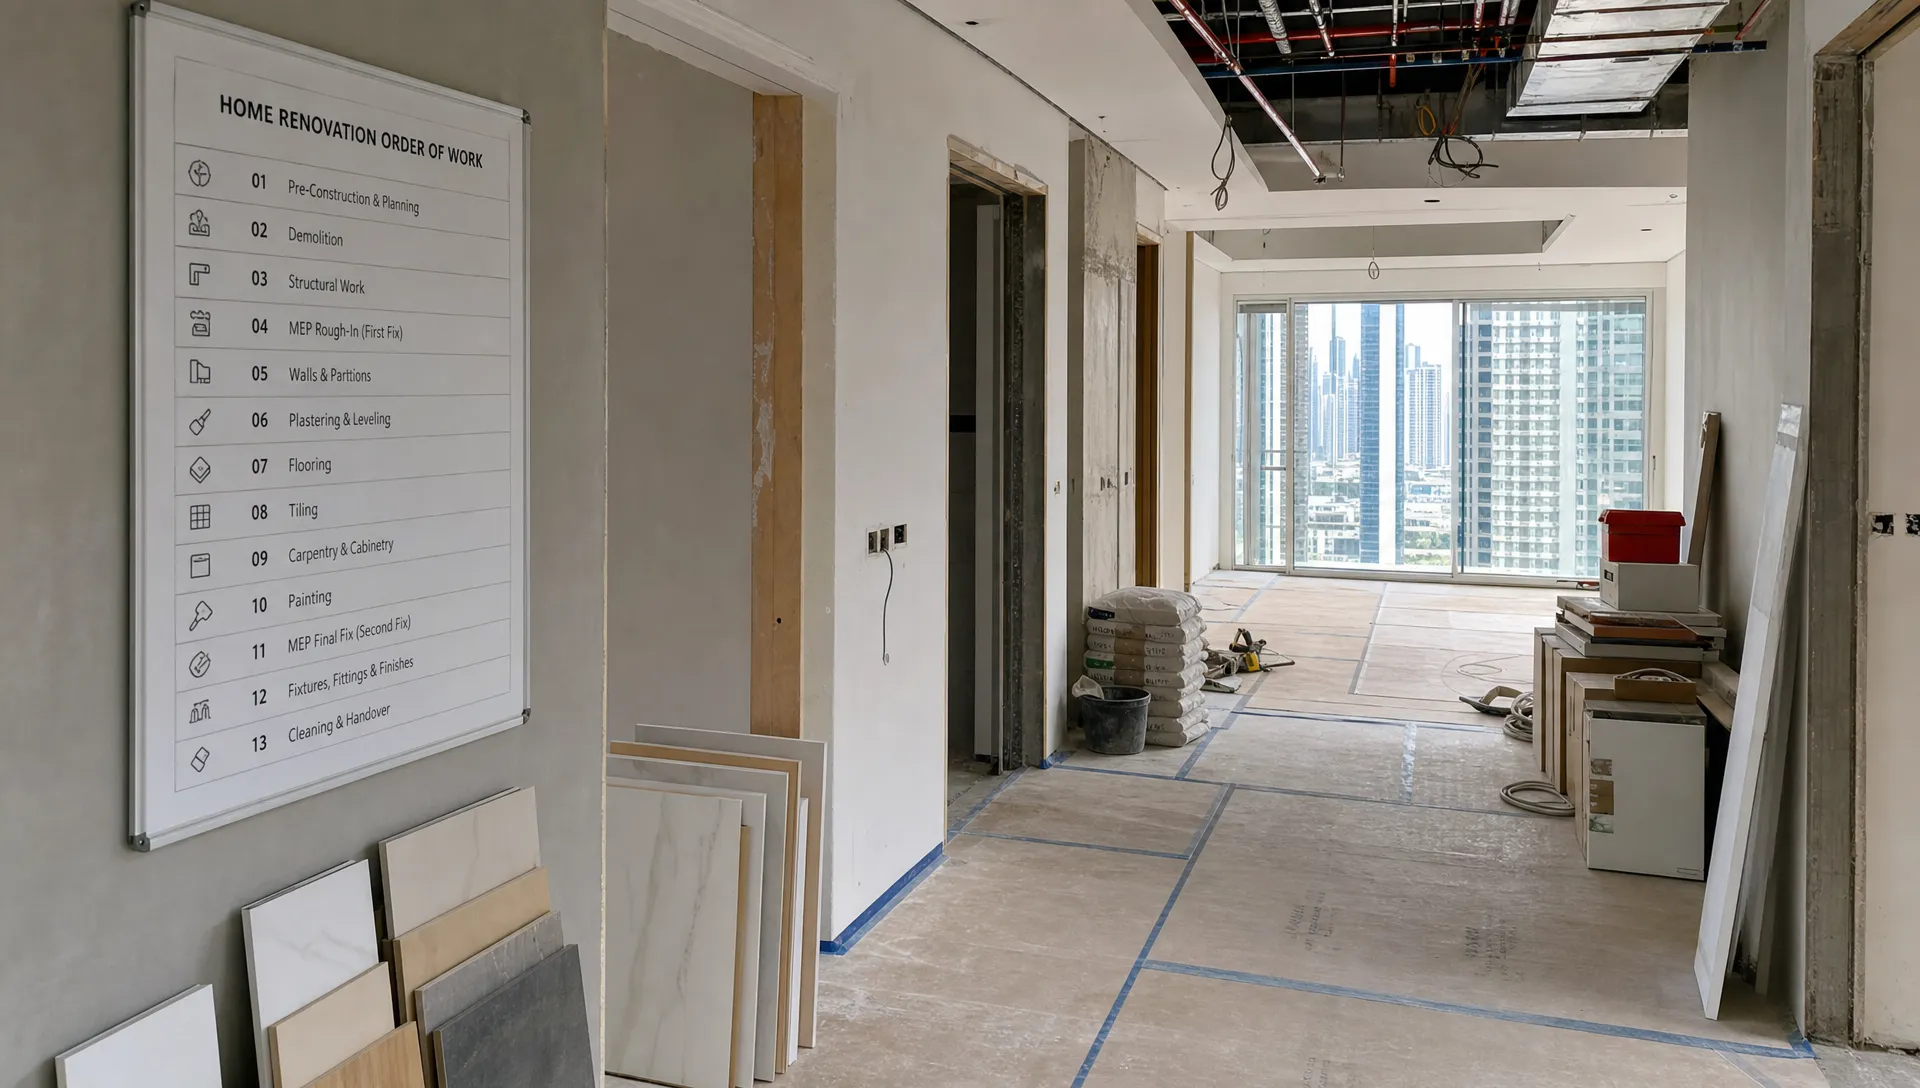
The best home renovation order of work follows how a space is physically built: plan first, open up the site, complete hidden technical systems, close surfaces, install fixed elements, finish details and inspect everything before handover.
Here is the broad sequence most full renovations follow:
| Phase | What Happens | Why It Comes Here |
|---|---|---|
| Planning and survey | Goals, site measurements, budget, scope and technical checks | Prevents vague pricing and design changes later |
| Design and approvals | Layouts, material selections, authority or building approvals where needed | Confirms what can legally and practically be built |
| Site preparation | Protection, access planning, temporary utilities and safety setup | Reduces damage and keeps the site organized |
| Demolition | Removal of old finishes, cabinets, ceilings, nonstructural elements and fixtures | Opens the space for inspection and new work |
| Structural or layout work | Wall changes, openings, supports and framing where applicable | Sets the new layout before services are installed |
| MEP rough-ins | Electrical, plumbing, HVAC routes, drainage and low voltage wiring | Places hidden systems before walls and ceilings close |
| Build back | Waterproofing, plaster, gypsum, screed, ceilings and surface preparation | Creates sound bases for visible finishes |
| Fixed installations | Flooring, doors, cabinets, joinery, countertops and built-in features | Adds permanent elements in the correct order |
| Final finishes | Paint, fixtures, lighting, appliances, hardware and styling | Completes visible details after heavy work ends |
| Testing and handover | Snagging, cleaning, documentation and final walkthrough | Confirms the space is safe, complete and ready to use |
Step 1: Define Goals, Budget and Scope
Start with what you want the renovation to achieve, not with finishes. Are you creating more storage, improving rental appeal, opening the kitchen, upgrading tired bathrooms or making the space feel more luxurious? Clear goals help your renovation team decide where to invest and where to simplify.
Your scope should be room by room. Include what stays, what goes, what must be repaired and what needs to be upgraded. This is also the right time to set a realistic budget range, including a contingency for hidden issues such as damaged pipes, weak substrate, uneven floors or outdated wiring.
Step 2: Complete the Site Survey and Technical Checks
A site survey gives the design and construction team the information needed to plan properly. It should include accurate measurements, existing service locations, ceiling heights, floor levels, drainage points, electrical panel capacity and any access constraints.
For apartments, the survey should also consider lift access, loading areas, working hours and building management rules. For villas, it may include external drainage, waterproofing conditions, garden access, boundary walls and service routes.
Step 3: Finalize Design, Selections and Approvals
Design should be developed far enough before work starts that the contractor can price accurately and order the right materials. This includes layouts, lighting plans, plumbing positions, joinery drawings, tile layouts, paint colors, sanitaryware, appliances and door hardware.
At this stage, the home renovation order of work should be stable enough to support procurement. If key selections remain undecided, the project may start quickly but slow down later while everyone waits for materials or revised details.
Dubai renovations can involve approvals from building management, developers, community associations or relevant authorities depending on the property and scope. Your contractor should confirm what applies before demolition begins.
Step 4: Prepare and Protect the Site
Site preparation is often overlooked because it is not glamorous, but it protects the property and the schedule. Floors, elevators, corridors, neighboring units and existing features should be protected before heavy work begins. Temporary lighting and safe power access may also be needed.
This is also when the team should confirm working hours, delivery routes, waste removal procedures and neighbor communication. Good preparation reduces complaints, avoids avoidable damage and makes the renovation easier to manage from day one.
Step 5: Demolition and Strip-Out
Demolition should follow the approved scope, not become an open-ended removal exercise. Old cabinets, tiles, ceilings, flooring, fixtures and nonstructural partitions are removed so the team can inspect what is behind them.
This stage often reveals issues that were impossible to confirm during the survey. Examples include moisture behind bathroom tiles, corroded pipework, poor previous workmanship or uneven walls. The right response is to document the issue, price the fix clearly and adjust the schedule before rebuild begins.
Step 6: Layout Changes and Framing
If the renovation includes new partitions, door openings, ceiling bulkheads or built-in niches, this work should happen before MEP routes are finalized. The layout must be physically marked and checked on site so switch positions, plumbing points and lighting lines make sense in the real space.
For structural changes, proper review and approval are essential. Never assume a wall can be removed because it looks minor. A responsible renovation team will verify what is possible before making changes that affect safety or building compliance.
Step 7: Electrical, Plumbing, HVAC and Low Voltage Rough-Ins
MEP rough-ins are the hidden backbone of the renovation. Electricians run cables for sockets, lighting, switches, appliances, smart controls and data points. Plumbers position hot and cold water lines, drainage and sanitary connections. HVAC work may involve ducting, grilles, thermostats or access panels.
This is the point in the home renovation order of work where future comfort is decided. If sockets are poorly placed or drainage is not sloped correctly, the finished room may look good but function badly. Walk through every room before walls close and confirm practical details such as bedside outlets, kitchen appliance points, mirror lighting, washing machine access and maintenance panels.
Step 8: Waterproofing, Walls, Ceilings and Surface Preparation
Wet areas need careful waterproofing before tiling or fixture installation. Bathrooms, laundry areas, balconies and some kitchen zones should be prepared according to the system being used, then checked before finishes cover the surface.
After MEP work is approved, walls and ceilings can be closed, plastered and prepared. Gypsum ceilings, access panels, bulkheads and recessed lighting openings are refined at this stage. Surface preparation matters because paint, wallpaper, tiles and wall finishes only look premium when the base is stable, smooth and correctly cured.
Step 9: Flooring, Tiles and Fixed Finishes
Flooring and tiles should be installed after wet, dusty and hidden works are complete. The exact order depends on the materials. Large-format tiles, wood flooring, marble, microcement and vinyl each have different substrate and protection requirements.
Kitchens need special sequencing because cabinets, countertops, backsplash, appliances and plumbing connections depend on each other. If your project includes a major kitchen upgrade, review the detailed kitchen renovation steps in order so measurements, fabrication and installation happen at the right time.
Step 10: Joinery, Cabinets, Doors and Countertops
Custom carpentry and joinery give a renovation its tailored feel, but they also require accurate coordination. Wardrobes, TV units, vanities, kitchen cabinets and storage walls should be based on final site dimensions, not only early drawings.
Cabinets and built-ins are usually installed before countertops, final appliance connections and some decorative finishes. Once joinery is fixed, stone or solid surface countertops can be templated, fabricated and installed. This reduces gaps, uneven lines and costly remakes.
Step 11: Painting, Fixtures, Lighting and Final Styling
Final painting, decorative wall finishes, lights, sanitary fixtures, switches, sockets, mirrors, appliances and hardware come near the end. These items are visible, delicate and easier to damage if installed too early.
For a cleaner result, heavy tools should be out of the space before final coats and delicate fittings begin. This is also the stage for interior styling, curtains, loose furniture, accessories and artwork. The goal is to move from construction site to finished living space without damaging the work you just paid for.
Step 12: Testing, Snagging and Handover
Before handover, every system should be tested. Check water pressure, drainage, hot water, AC performance, lights, dimmers, appliances, door alignment, cabinet hardware, floor transitions and paint touch-ups. Snagging is not a formality. It is the process that turns a nearly finished renovation into a properly completed one.
A professional team should walk you through the finished areas, record outstanding items and explain basic care or maintenance where needed. If you want to understand the full client journey from consultation to closeout, this guide to professional renovation home services explains what a structured process should feel like.
What Can Change the Order in a Dubai Renovation?
No two projects follow the exact same timeline. For apartments, the home renovation order of work may also depend on building approval times, elevator bookings, noise restrictions and delivery access. For villas, sequencing can shift around outdoor work, pool areas, facade upgrades, landscaping or weather-sensitive tasks.
Material lead times also matter. Imported tiles, sanitaryware, lighting, appliances and specialty finishes should be ordered early enough to avoid site delays. If a product has a long lead time, your contractor may adjust the schedule so other rooms progress while that item is in transit.
Commercial and home-office renovations need another layer of planning: continuity. If your space supports a customer-facing business, protect response times while construction is underway. Some brands use managed customer service teams and CX consulting during busy transitions so customers keep receiving support even when internal teams are distracted by an office move or fit-out.
Common Mistakes That Disrupt the Order
Most avoidable delays happen when the home renovation order of work is treated as flexible after construction starts. Some flexibility is normal, but major changes after demolition can affect drawings, permits, procurement, subcontractor scheduling and cost.
The most common problems include starting without final selections, changing layouts after MEP rough-ins, ordering custom joinery too early, installing finishes before dusty work ends and skipping proper protection. Another frequent issue is unrealistic timing. A renovation may look simple on paper, but curing times, inspections, building access and material deliveries all need space in the schedule.
Good communication prevents many of these issues. Decisions should be documented, changes should be priced before work proceeds and the client should know what decisions are needed next. A calm renovation is usually not the fastest one. It is the one where everyone understands the next step.
How to Keep the Build Stress-Free
A stress-free renovation starts before the first wall is opened. Confirm the scope, budget, drawings, responsibilities and timeline in writing. Ask your contractor what decisions are needed by each phase and which items have long lead times.
It also helps to keep one decision log. This can include approved finishes, paint codes, appliance models, tile quantities, hardware choices and change requests. When every decision lives in one place, there is less room for confusion between the client, designer, site supervisor and trades.
Finally, be realistic about living through construction. If the project is extensive, moving out temporarily may be more practical. If you stay, agree on dust control, working zones and temporary access to essential areas. Comfort during renovation depends as much on planning as it does on craftsmanship.
Frequently Asked Questions
What is the correct home renovation order of work? The usual order is planning, survey, design, approvals, site protection, demolition, layout work, MEP rough-ins, waterproofing, walls and ceilings, flooring, joinery, final fixtures, snagging and handover. Some steps may overlap depending on the project.
Should I buy materials before demolition starts? Buy confirmed long-lead items early, but avoid ordering custom items before measurements and technical details are verified. Cabinets, countertops and some glass or joinery pieces often need final site dimensions.
Can I renovate one room at a time? Yes, phased renovation can work well if the sequence protects finished areas and keeps essential services available. Bathrooms, kitchens and bedrooms need especially careful planning because they affect daily routines.
When should electrical and plumbing work happen? Electrical and plumbing rough-ins should happen after demolition and layout framing, but before walls, ceilings and finishes are closed. This makes it easier to route services properly and check everything before it is hidden.
How long does a full home renovation take in Dubai? Timelines vary by property size, approval requirements, material availability and scope. A cosmetic refresh may take weeks, while a full villa or apartment renovation with MEP, joinery and premium finishes can take significantly longer.
Plan Your Renovation With the Right Team
The right sequence is what turns a renovation from a stressful gamble into a managed build. When planning, design, technical work, finishes and handover follow a clear path, your home is more likely to finish on time, on budget and at the quality level you expected.
Revo Craft Renovations helps homeowners and businesses in Dubai plan and deliver tailored renovation projects with modern design, premium finishes, skilled craftsmanship and transparent communication from start to finish. If you want your next renovation to feel organized from the first consultation, start with a clear scope and a team that knows how to execute each phase in the right order.