
A successful remodel is not just about choosing tiles, cabinets or paint colors. It is a sequence of decisions, approvals, site checks, trades and quality controls that need to happen in the right order. When the order is wrong, owners often face delays, budget creep, rework and frustration that could have been avoided with clearer planning.
For Dubai homeowners, the process can also involve building management rules, community guidelines, elevator bookings, service shutdown permissions and work-hour restrictions. Whether you are updating an apartment, remodeling a villa or transforming a commercial unit, understanding the home remodel construction steps helps you stay in control from the first idea to final handover.
Why the Construction Sequence Matters
Home remodel construction has a natural workflow. Design decisions affect materials. Materials affect budget. Budget affects procurement. Procurement affects the construction schedule. If any one part is rushed or skipped, the next stage becomes harder to manage.
For example, changing a kitchen layout after plumbing rough-in may mean breaking newly finished walls. Choosing large-format tiles after the floor level has already been prepared can affect door clearances. Adding smart lighting late in the project may require extra wiring work that disrupts finished ceilings.
The aim is not to make owners manage every technical detail themselves. A good renovation team should guide the process. Still, when you understand the main stages, you can ask better questions, approve decisions with confidence and spot problems before they become expensive.
Step 1: Define the Real Goal of the Remodel
Before drawings, quotes or site visits, define what you want the remodel to achieve. A vague goal like “make the home look modern” is difficult to price and even harder to build. A clear goal such as “open the kitchen to the dining area, add more concealed storage and upgrade the lighting for family gatherings” gives your designer and contractor something practical to work with.
Start by separating wants from needs. Needs may include repairing water damage, upgrading old plumbing, improving storage or making the home more accessible. Wants may include luxury finishes, decorative wall panels, built-in shelving or a new color palette. Both matter, but they should not carry the same priority when budget decisions arise.
If you are still clarifying whether your project is a renovation, remodel or larger construction scope, this guide to renovation and remodeling for homeowners explains the distinction in practical terms.
Step 2: Build a Room-by-Room Scope
A room-by-room scope turns ideas into a buildable plan. It also makes quotes easier to compare because every contractor is pricing the same work.
For each space, note what will stay, what will be removed and what needs to be added. In a kitchen, that could include cabinetry, countertops, splashback, lighting, appliances, plumbing points and electrical outlets. In a bathroom, it may include waterproofing, drainage, sanitaryware, ventilation, mirrors and storage. In a living area, the scope might focus on flooring, ceiling work, feature walls, joinery and lighting scenes.
A strong scope should cover:
- Layout changes and wall modifications
- Flooring, ceiling and wall finishes
- Electrical, plumbing and air-conditioning adjustments
- Built-in carpentry, storage and joinery
- Fixtures, fittings, appliances and hardware
- Protection of existing finishes that will remain
- Final cleaning, snagging and handover requirements
The more specific your scope is, the fewer assumptions there will be during pricing. Assumptions are where many disputes begin.
Step 3: Check Site Conditions Before Finalizing Design
Many homeowners fall in love with a design before checking whether the site can support it. A site inspection should happen early, especially for projects involving kitchens, bathrooms, structural openings, MEP upgrades or full-home remodeling.
The contractor or technical team should inspect existing walls, ceiling voids, floor levels, water supply points, drainage lines, electrical capacity and AC routes. In apartments, they should also consider access routes, lift dimensions, loading areas and building management rules. In villas, external areas, service rooms, waterproofing, roof conditions and garden access may matter.
This step is not glamorous, but it protects your budget. If hidden problems exist, it is better to discover them before signing off on finishes and ordering materials.
Step 4: Set a Budget With a Contingency
A remodel budget should include more than the contractor’s labor and material quote. Owners often forget temporary accommodation, storage, appliance upgrades, permit-related costs, cleaning, furniture replacement or small accessories that complete the space.
It is wise to keep a contingency for unknown conditions, especially in older properties. Hidden leaks, uneven floors, outdated wiring and damaged substrates can only be fully assessed once demolition begins. A contingency does not mean you expect the project to go wrong. It means you are prepared for normal construction uncertainty.
| Budget category | What it usually covers | Why it matters |
|---|---|---|
| Design and planning | Drawings, material selection, technical coordination | Helps prevent unclear pricing and rework |
| Construction works | Demolition, civil work, MEP, installation and finishing | Forms the core of the remodel cost |
| Materials and fixtures | Tiles, sanitaryware, lighting, hardware, appliances and finishes | Drives both look and durability |
| Approvals and access | Building management requirements, work permits and site logistics | Can affect schedule and start date |
| Contingency | Hidden repairs, site changes or upgrade decisions | Reduces stress when unexpected issues appear |
When comparing quotes, look beyond the final number. A low quote that excludes key items can become more expensive than a detailed quote that looks higher at first.
Step 5: Develop the Design and Material Specification
The design stage should connect style with construction reality. Mood boards are helpful, but the project also needs measurements, drawings, finish schedules and technical details. This is where the remodel shifts from inspiration to execution.
Material specifications should include brands or quality levels where possible, not just generic terms. “Porcelain tile” is too broad. Tile size, finish, slip resistance, grout color and edge profile can all affect the final result. The same applies to cabinetry, countertops, hinges, paint systems, lighting and sanitaryware.
If you use online references, organize them carefully. A kitchen image from a large villa may not translate directly into a compact apartment layout. The goal is to extract useful ideas, not copy a space that has different dimensions, climate, usage patterns or services. For a practical approach, see how to use home remodeling sites for better planning without letting inspiration overwhelm the process.
Step 6: Confirm Approvals, Permissions and Building Rules
In Dubai, many remodels require coordination with building management, developers, community managers or relevant authorities depending on the property type and scope. Even when formal authority approvals are not complex, your building may still have rules about contractor registration, work timings, noisy work, service elevator use, debris removal and common-area protection.
Do not leave this step until the week construction is supposed to begin. Approval delays can push your start date back, especially in managed apartment buildings or gated communities. Ask your contractor what documents they need to prepare, who submits them and how long the approval process usually takes for your type of project.
Clear documentation also protects you. If there is a complaint from a neighbor, a delivery issue or a site access dispute, approved paperwork makes the situation easier to manage.
Step 7: Create a Realistic Construction Schedule
A construction schedule should show the order of work, estimated duration and key decision deadlines. It should also include dependencies. For instance, flooring may depend on screed curing, cabinetry installation may depend on final wall measurements and countertop fitting may depend on base cabinet completion.
The schedule should also reflect your household routine. If you work from home, have young children, care for an elderly family member or need quiet periods, discuss this before work begins. If your week includes regular school runs, medical visits or speech and language therapy appointments in Dubai, share those constraints with your project team so noisy work, access needs and temporary room closures can be planned more thoughtfully.
A realistic schedule is not just a promise of a completion date. It is a coordination tool that helps everyone understand what must happen next.
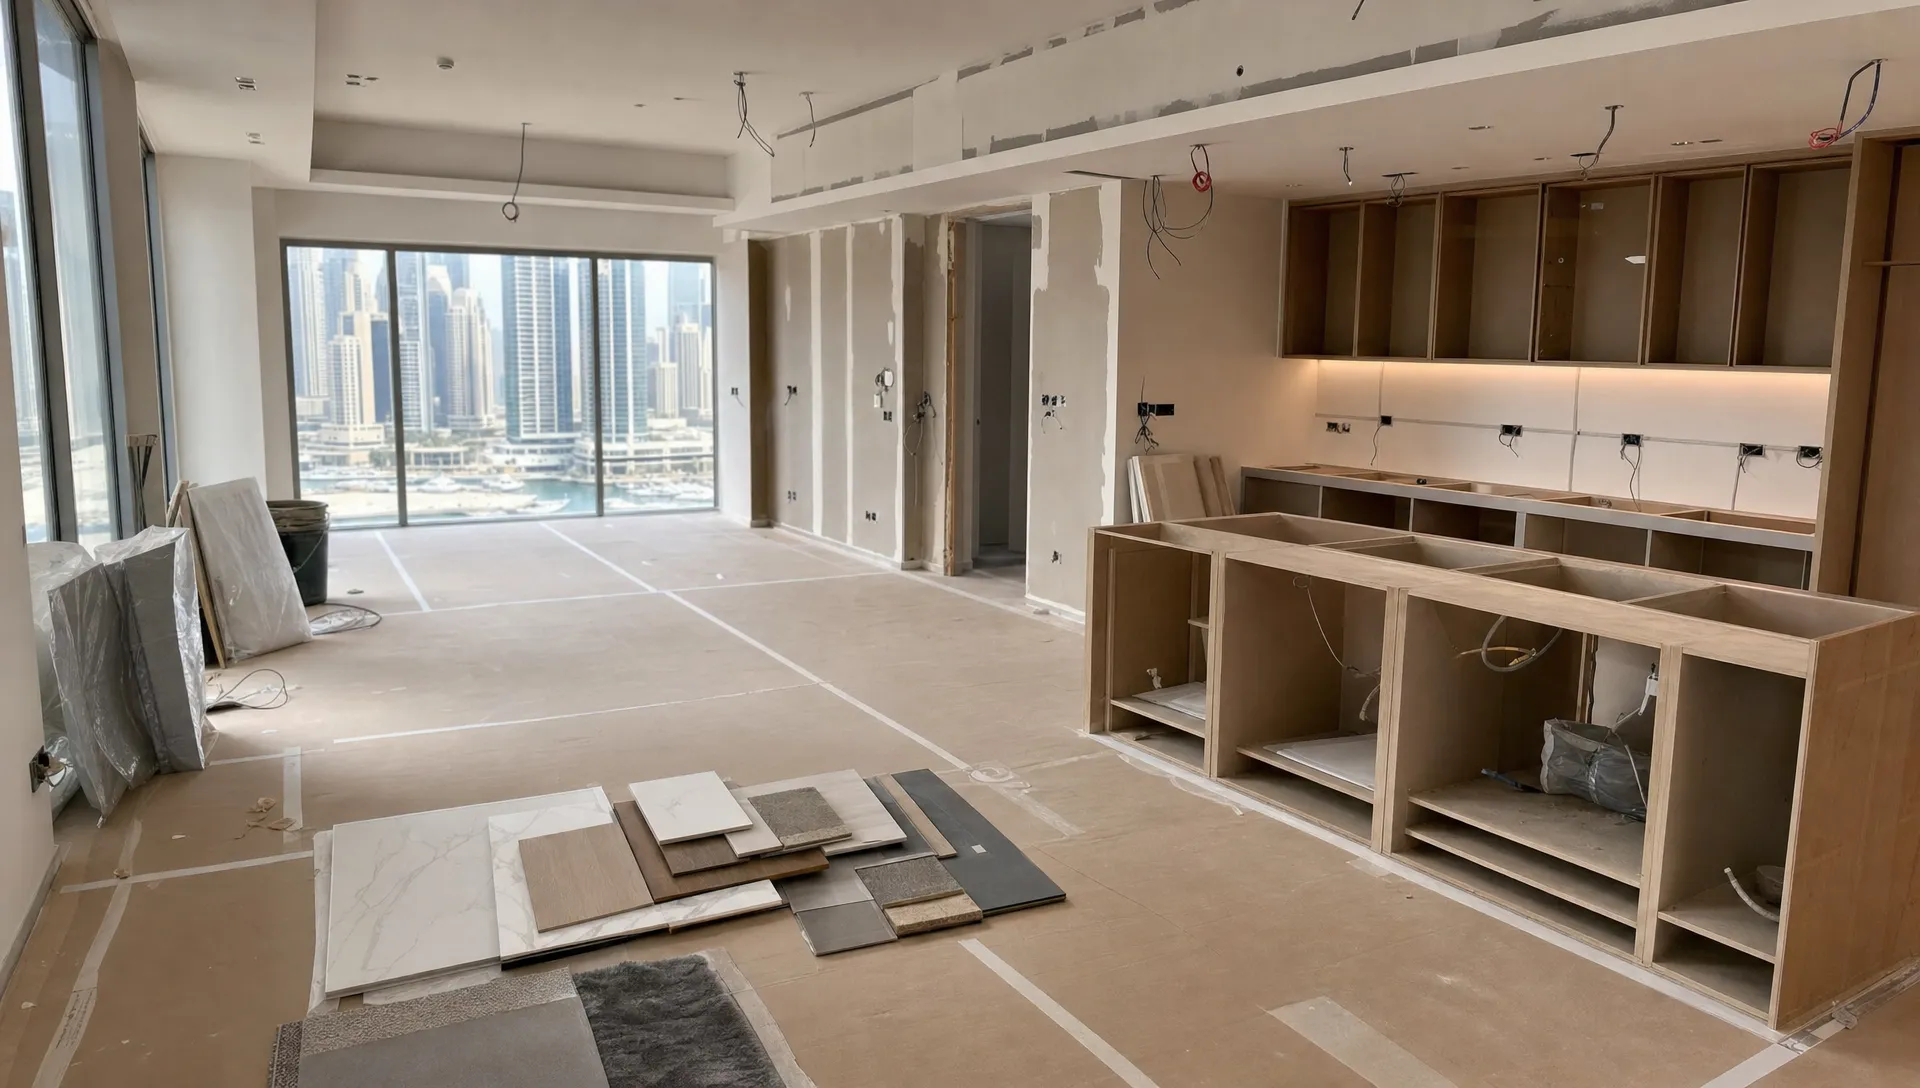
Step 8: Prepare the Site Before Demolition
Site preparation reduces damage, dust spread and confusion. Floors that remain should be protected. Elevators, corridors and shared areas may need temporary coverings. Furniture should be removed, wrapped or isolated from the work zone. Utilities should be checked before demolition begins.
This is also the time to confirm storage areas for materials, waste removal routes and delivery timing. Poor site preparation can cause problems throughout the project. Materials get damaged, workers lose time moving items repeatedly and finished areas may suffer scratches or stains.
For occupied homes, temporary living arrangements matter. You may need a makeshift pantry, alternative bathroom plan or sealed-off sleeping area. If the project involves major plumbing, electrical or AC work, expect service interruptions and agree on notice periods in advance.
Step 9: Start Demolition and Structural Adjustments Carefully
Demolition looks simple, but it should be controlled. The team needs to know which walls, tiles, ceilings, fixtures and services are being removed. They should also know what must remain untouched.
During demolition, hidden conditions often appear. These may include moisture behind bathroom tiles, poorly routed wiring, uneven blockwork, damaged pipes or previous repairs that were concealed. When this happens, pause and document the issue before moving forward. Quick verbal decisions on site can lead to cost disputes later.
If structural changes are involved, such as wall openings or load-related modifications, they should be reviewed and handled by qualified professionals. Never assume a wall is safe to remove because it looks lightweight.
Step 10: Complete MEP Rough-In Before Closing Walls
MEP refers to mechanical, electrical and plumbing work. In a home remodel, this includes water supply, drainage, wiring, sockets, lighting circuits, AC adjustments, exhaust fans, smart controls and sometimes low-current systems such as data or security wiring.
This stage must be coordinated before walls, ceilings and floors are closed. Outlet locations should match furniture layouts. Lighting points should align with ceiling design. Plumbing points should match the selected sanitaryware or kitchen appliances. AC diffusers and access panels should be positioned so they work well and remain serviceable.
Good MEP planning is one of the biggest differences between a remodel that looks good for a few months and one that performs well for years. Beautiful finishes cannot compensate for poor drainage, weak lighting or inaccessible maintenance points.
Step 11: Move Into Finishing, Joinery and Installation
Once rough work is inspected and approved, the project moves into visible transformation. This includes plastering, waterproofing where required, tiling, painting, flooring, ceiling finishing, cabinetry, countertops, doors, hardware, lighting fixtures and sanitaryware installation.
Finishing requires patience. Rushing paint before surfaces are properly prepared can cause uneven texture. Installing joinery before wet works are complete can expose woodwork to moisture. Fitting fixtures before heavy works are finished can lead to scratches and damage.
This stage also demands coordination between trades. Cabinetry affects countertop measurements. Countertops affect splashback finishing. Lighting affects how wall finishes appear. Door hardware affects final alignment. A capable project manager keeps these details moving in the correct order.
Step 12: Inspect, Snag and Handover Properly
The handover stage is where owners should slow down, not rush to move back in. Snagging means identifying items that need correction before final acceptance. These may include paint touch-ups, uneven silicone, loose handles, chipped tiles, misaligned doors, low water pressure, lighting issues or minor scratches.
Walk through the property with your contractor and record each item clearly. Photos help. Assign responsibility and agree on a completion date for snags. Test everything you can, including switches, sockets, taps, drains, cabinet doors, appliance connections, exhaust fans and AC controls.
Ask for product manuals, warranty documents, paint codes and care instructions for finishes. These details are useful months later when you need maintenance, touch-ups or replacement parts.
For a more detailed planning companion, this full home renovation checklist can help you track decisions before, during and after construction.
Common Mistakes Owners Should Avoid
Even well-intentioned homeowners can create delays by approving designs too quickly, changing materials mid-project or assuming that all contractors include the same scope. A remodel is a chain of linked decisions, so late changes rarely stay isolated.
Some of the most common mistakes include starting without a written scope, buying materials before measurements are confirmed, ignoring building rules, underestimating MEP work and focusing only on visible finishes. Another common issue is not assigning one person to make final decisions. When several family members give different instructions to the site team, mistakes become more likely.
The best way to avoid these problems is to communicate through a clear project channel. Decisions should be documented, drawings should be updated and changes should be priced before work proceeds.
What to Look for in a Remodeling Partner
The right remodeling partner should be able to connect design, construction, coordination and communication. Look for a team that asks detailed questions, inspects the property properly, explains exclusions and gives you a structured process instead of vague promises.
You should expect clarity on scope, schedule, materials, payment milestones, approvals and site protection. You should also feel comfortable asking questions. A professional renovation company will not treat your concerns as interruptions. Clear communication is part of good project management.
If you want to understand what happens beyond the visible site work, this overview of professional renovation home services explains how planning, coordination and handover are typically handled behind the scenes.
Frequently Asked Questions
How long does home remodel construction usually take? The timeline depends on the size of the property, complexity of the scope, approvals, material availability and whether the home is occupied. A bathroom update may take weeks, while a full villa remodel can take several months.
Should I move out during a remodel? For small cosmetic updates, staying may be manageable. For projects involving bathrooms, kitchens, flooring, ceiling work or major MEP changes, moving out often reduces stress and allows the contractor to work more efficiently.
What should be finalized before construction starts? Finalize the scope, budget, drawings, key materials, approval requirements, work schedule and decision-making process. Some minor choices can happen later, but layout, MEP points and major finishes should be settled early.
Why do remodeling costs change after work begins? Costs can change when hidden site conditions are discovered, when owners request upgrades or when the original scope was not detailed enough. A clear contract and contingency budget reduce the risk of surprises.
Is project management necessary for a home remodel? Yes, especially when multiple trades are involved. Project management coordinates sequence, quality, deliveries, site access and communication so the remodel does not depend on guesswork.
Plan Your Remodel With Confidence
Home remodel construction becomes far less stressful when every stage has a purpose. Define the goal, build a clear scope, inspect the site, confirm approvals, sequence the work properly and protect enough time for snagging. The result is a smoother project and a home that feels better designed for everyday life.
Revo Craft Renovations helps homeowners and businesses in Dubai plan and deliver tailored renovation, remodeling, interior upgrade, wall finishing, MEP and custom joinery projects with a focus on craftsmanship, communication and practical execution. If you are preparing to remodel your space, contact Revo Craft Renovations to discuss your goals and take the next step with a team that understands the full process.