
A kitchen renovation starts long before anyone removes a cabinet or orders a slab of stone. The first sketch, the way you map storage, the appliance decisions, the site protection plan and the final inspection all affect how smoothly the project runs. In Dubai homes, where apartments, villas and mixed-use buildings often have specific access rules and service constraints, the order matters even more.
Understanding the steps to kitchen renovation gives you a practical roadmap. It helps you make decisions at the right time, avoid expensive rework and know what your contractor should be checking before each phase begins.
The steps to kitchen renovation at a glance
A kitchen project is easier to manage when each stage has a clear output. The first sketch should lead to a measured layout, the measured layout should lead to technical planning and technical planning should lead to a controlled site phase. If one of those links is missing, the project can stall during demolition, countertop fabrication or appliance installation.
| Phase | Main purpose | Key decision before moving ahead |
|---|---|---|
| First sketch and brief | Define how the kitchen should work | Daily routines, storage needs and style direction |
| Measured layout | Turn the idea into a buildable plan | Cabinet dimensions, appliance positions and traffic flow |
| Budget and materials | Align the design with cost and durability | Finishes, fixtures, contingency and lead times |
| Approvals and scheduling | Prepare the site for work | Building rules, work hours, access and protection |
| Construction and installation | Build the kitchen in the right sequence | Rough-ins, cabinets, countertops, lighting and appliances |
| Final inspection | Confirm quality and handover details | Snag list, testing, cleaning and documentation |
These steps to kitchen renovation are not about adding bureaucracy. They help you make fewer decisions under pressure, which is where many kitchen upgrades become more expensive than planned.
Step 1: Start with the first sketch, not the shopping list
The first sketch does not need to be a polished design drawing. It can begin with a simple plan of where you want the sink, hob, fridge, prep area and tall storage. The goal is to capture how the kitchen should support your life, not just how it should look in photos.
Think through your weekday routine. Do you cook daily or mainly reheat meals? Does the kitchen need space for two people to move at the same time? Do you host often? Are groceries bought in bulk? Do you need a breakfast counter, a closed utility zone or more concealed storage for small appliances?
This early brief should separate must-haves from nice-to-haves. For example, a durable countertop, deep drawers and better task lighting may matter more than decorative wall cladding. If the renovation is for a rental property, resale home or commercial apartment, the priorities may shift toward easy maintenance, neutral finishes and long-term durability.
Step 2: Measure the existing kitchen properly
A concept only becomes useful when it is checked against the real site. Accurate measurements should include wall lengths, ceiling height, window positions, door swings, service points, drainage locations, electrical outlets, gas points if applicable and any columns or beams that affect cabinetry.
Photos are also useful. Capture the current kitchen from each corner, inside cabinets, behind accessible appliances and near service connections. These references help the design and site teams spot constraints before demolition starts.
For apartments in Dubai, the existing wet area and service risers can heavily influence the layout. Moving plumbing may be possible in some homes, but it should never be assumed. A skilled renovation team will check the site conditions before promising major changes to sink, dishwasher or washing machine positions.
Step 3: Set a realistic budget and decision hierarchy
A kitchen budget is not only the price of cabinets. It may include demolition, disposal, plumbing, electrical work, lighting, waterproofing where needed, wall preparation, flooring, backsplash, countertops, appliance installation, painting, accessories, permits or building management fees and professional project management.
One of the most valuable steps to kitchen renovation is deciding what deserves the strongest part of the budget. For many homes, that means spending on the items that affect daily use: cabinet hardware, countertop quality, sink and mixer, lighting design, ventilation and electrical safety.
A contingency is also sensible because kitchens often hide problems. Once old cabinets and tiles are removed, you may discover damaged walls, weak flooring, outdated pipes or unsafe wiring. If you want to reduce the chance of budget surprises before work begins, review common planning issues in this guide to kitchen renovation mistakes to avoid.
Step 4: Turn the sketch into a working layout
The kitchen layout should make movement feel natural. The classic sink, hob and fridge triangle can still be useful, but many modern kitchens work better when planned as zones: preparation, cooking, washing, storage and serving.
A good layout checks more than the visible arrangement. It should confirm that drawers can open fully, dishwasher doors do not block key walkways, fridge doors have enough clearance and upper cabinets do not make the room feel heavy. Counter space beside the hob and sink matters just as much as the size of the appliances.
If your main goal is better flow, storage and safety, the practical advice in these kitchen design and renovation tips can help you compare layout options before you commit to drawings.
Step 5: Choose materials before demolition begins
Material choices affect cost, schedule and installation details. Cabinet finishes, countertop thickness, backsplash format, floor tiles, sink model, mixer height, handles, hinges and lighting trims all need to work together. Leaving these decisions too late can delay fabrication or force compromises.
In Dubai, durability should be part of the design conversation. Kitchens deal with heat, moisture, frequent cleaning and heavy use. High-quality laminates, engineered stone, porcelain surfaces, moisture-resistant boards and reliable hardware can help the kitchen stay attractive longer, provided they are installed correctly.
This is also the right time to confirm appliance specifications. Built-in ovens, hobs, extractors, dishwashers and refrigerators all have ventilation requirements, power needs and cut-out dimensions. If an appliance changes after cabinetry is manufactured, the knock-on effect can be expensive.
Step 6: Confirm approvals, access rules and site protection
Before work starts, confirm whether the property requires approvals from the landlord, developer, community management or building management. Requirements vary depending on the property type and scope. Apartment works may have rules for service lift use, working hours, noise, waste removal and common area protection.
For villa renovations, access may be easier, but protection still matters. Floors, doors, nearby joinery, AC vents and adjacent rooms should be protected before demolition. Dust control is especially important when the family remains in the home during the work.
A written schedule should show who is responsible for procurement, delivery coordination, inspections and approvals. For larger residential portfolios or business renovation projects, clean operational systems can be as useful as good site supervision. Companies that coordinate purchasing, finance and inventory across multiple locations often look at AI automation and NetSuite ERP consulting to reduce blind spots in their back-office workflows, a principle that also applies to renovation planning: the clearer the data, the fewer surprises during execution.
Step 7: Prepare a temporary kitchen plan
Living through a kitchen renovation is easier when you plan for the disruption. If the property will remain occupied, set up a temporary area with a kettle, microwave, small fridge and basic storage. Confirm when water, electricity and cooking access may be interrupted.
Families with children, pets or elderly relatives should think about dust, noise and safety barriers. A kitchen site has sharp tools, exposed wiring during certain phases and heavy materials moving through the home. Clear boundaries help prevent accidents and protect the work.
This preparation does not need to be complicated. It simply reduces stress once the site becomes active.
Step 8: Demolition and site discovery
Demolition should be controlled, not rushed. The team removes old cabinets, countertops, appliances, wall finishes and flooring as required. During this stage, they should check the condition of the walls, subfloor, plumbing lines and electrical points.
This is the moment when hidden issues appear. Water damage behind cabinets, uneven floors, loose plaster or outdated wiring can change the work plan. A reliable contractor will explain the issue, recommend a practical solution and confirm cost or schedule impact before moving ahead.
Good demolition also includes proper waste handling and daily site cleaning. A tidy site is not just about appearance. It makes inspection easier and reduces the risk of damage to finished areas of the home.
Step 9: Complete rough-ins for plumbing, electrical and ventilation
The technical steps to kitchen renovation begin with rough-ins. This is when pipes, drainage, sockets, switches, lighting points, appliance feeds and ventilation routes are adjusted before walls are closed and finishes begin.
Electrical planning should match real appliance loads and usage. A kitchen may need dedicated circuits for ovens, hobs, dishwashers or other high-demand appliances, depending on the equipment. Socket placement should support small appliances without cluttering the backsplash.
Plumbing work should confirm water supply, drainage fall, isolation valves and access for future maintenance. Ventilation should be checked for the chosen hob and extractor. These items are not glamorous, but they determine whether the finished kitchen is safe, practical and easy to maintain.
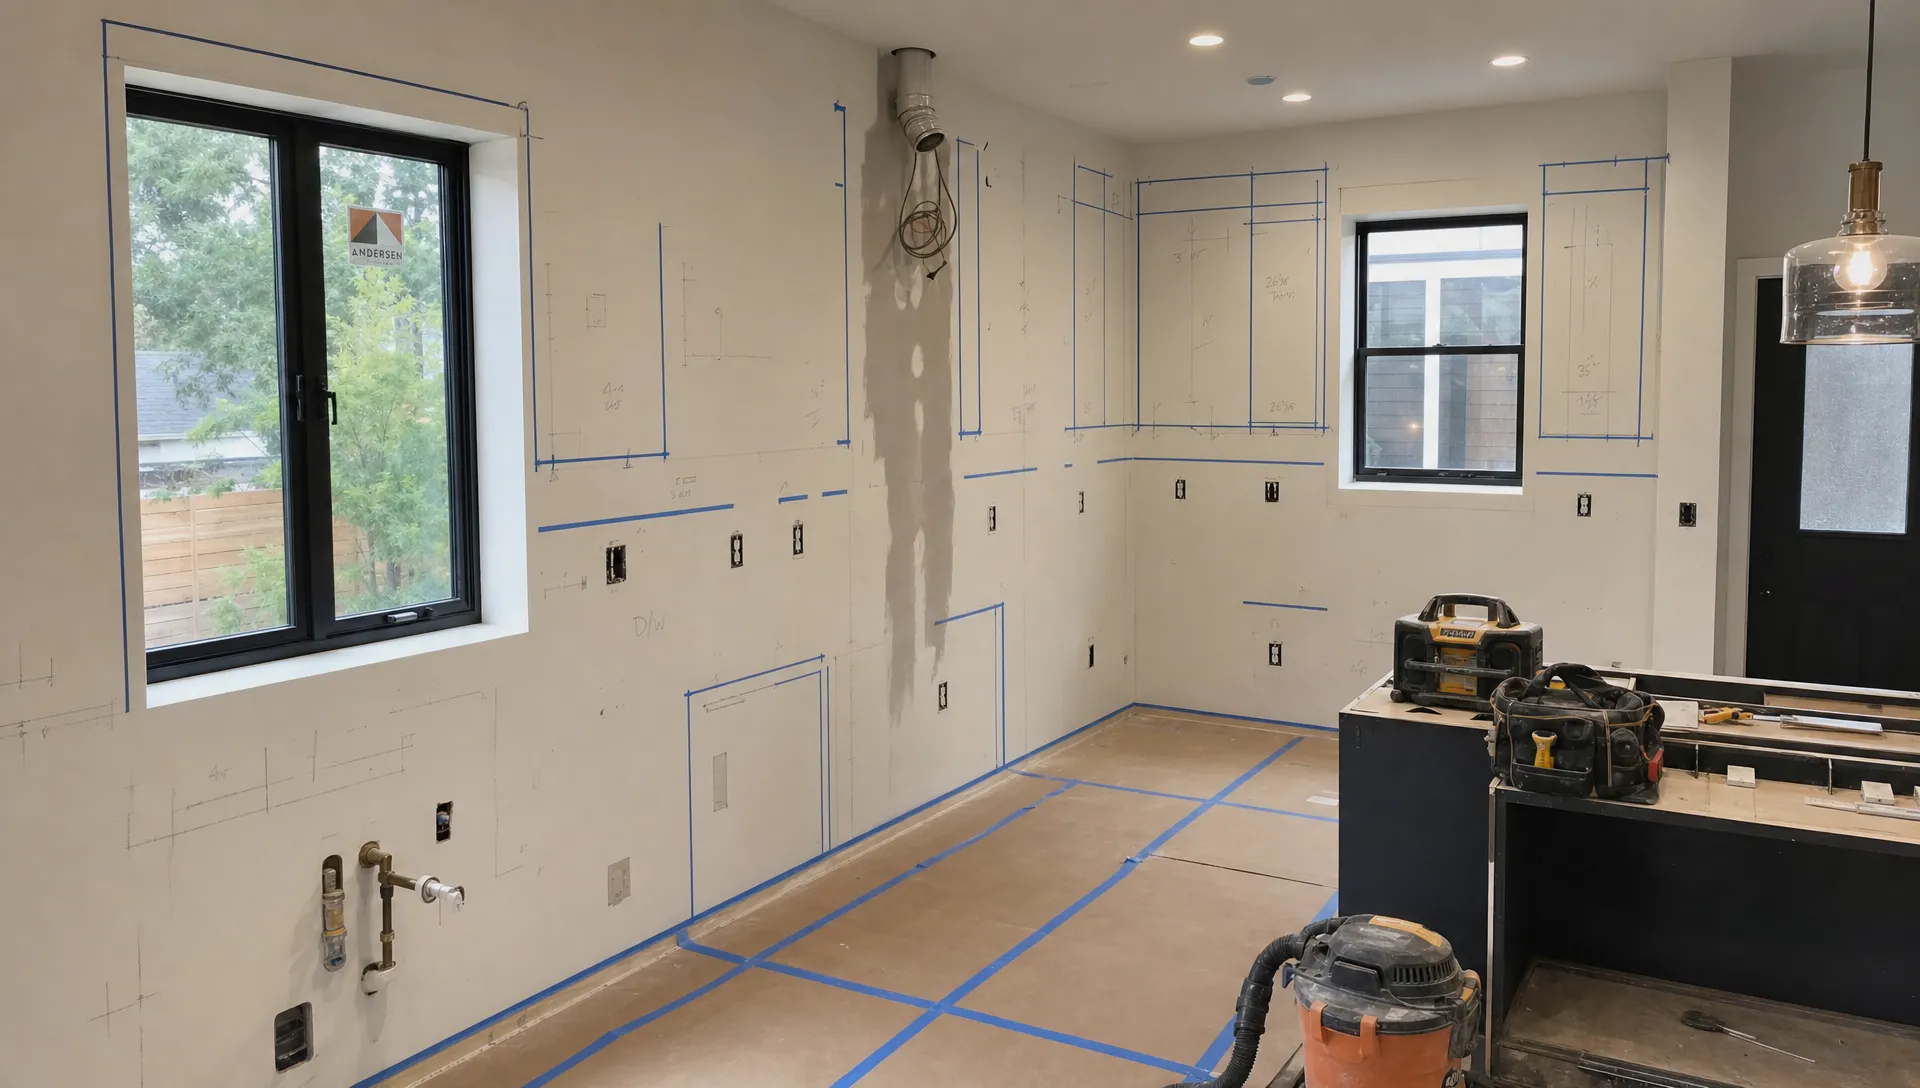
Step 10: Repair walls, prepare floors and install core finishes
After rough-ins are completed and checked, surfaces need to be made ready for the visible finishes. Walls may require patching, plastering or moisture-resistant preparation. Floors may need leveling before tile, stone or other flooring is installed.
This stage affects the final look of the kitchen more than many homeowners expect. Cabinets installed against uneven walls can leave awkward gaps. Countertops placed on poorly aligned base units can create fitting problems. Tiles laid before the substrate is ready may crack or sound hollow later.
A quality finish starts with a stable base. The cleaner the preparation, the better the installation of cabinets, counters and backsplash will be.
Step 11: Install cabinets and template the countertop
Cabinet installation is one of the most visible milestones. Base units are positioned, leveled and fixed first, followed by tall units, wall cabinets and panels. The installer should check alignment, door gaps, drawer movement and clearances as the work progresses.
Once base cabinets are fixed and the sink or hob requirements are confirmed, the countertop can be templated. Templating is the exact measurement process used before fabrication. Any change after this point can delay the project or require costly adjustments.
Countertop installation usually happens after fabrication. The team should check joints, overhangs, cut-outs and support. Heavy surfaces need proper handling and accurate installation to prevent cracking, uneven seams or stress on the cabinetry.
Step 12: Add backsplash, fixtures, appliances and lighting
The kitchen starts to feel complete when the backsplash, sink, mixer, appliances, handles and lighting are installed. This is also when small details become noticeable. Poorly aligned sockets, uneven silicone, mismatched trim or badly positioned handles can reduce the quality of an otherwise good renovation.
Lighting should be tested in layers. Ceiling lights provide general brightness, under-cabinet lights support food preparation and decorative pendants can define an island or breakfast counter. Warmth and brightness should suit the material palette, especially if the kitchen uses reflective stone, glossy cabinets or dark finishes.
Appliances should be fitted according to manufacturer requirements. Doors must open correctly, ventilation gaps should be respected and built-in units should sit flush without forcing panels out of alignment.
Step 13: Final inspection, snagging and handover
The final inspection is not a quick walk-through. It is a structured check of function, finish and safety. Open every drawer. Run water. Test drainage. Switch on lights. Check sockets. Inspect cabinet gaps. Look closely at silicone lines, paint edges, tile joints, countertop seams and appliance fit.
The final steps to kitchen renovation should include a written snag list. Each item should be clear, visible and assigned for correction. A professional handover also includes cleaning, basic care instructions and any available warranty or product documents.
| Inspection area | What to check | Why it matters |
|---|---|---|
| Cabinetry | Alignment, hinges, drawer runners and handles | Prevents daily irritation and premature wear |
| Countertop | Seams, cut-outs, support and surface condition | Protects the most used work surface |
| Plumbing | Leaks, water pressure, drainage and sealant | Reduces risk of hidden water damage |
| Electrical | Switches, sockets, lighting and appliance power | Supports safe and practical use |
| Appliances | Fit, ventilation, door clearance and operation | Helps equipment perform as intended |
| Finishes | Paint, backsplash, grout, silicone and trim | Determines the final quality of the space |
Do not rush this stage because everyone is eager to finish. A careful inspection protects your investment and gives the contractor a clear path to close the project properly.
How long does a kitchen renovation take?
Timelines vary based on kitchen size, building rules, material lead times and the amount of plumbing or electrical change. A cosmetic refresh may be much quicker than a full renovation with custom cabinetry, new services and stone fabrication.
The design and procurement phase can take as much attention as the site phase. If cabinets, countertops, tiles or appliances are not confirmed early, the site may be ready but waiting on materials. This is why schedule planning should begin before demolition, not after it.
For a broader view of sequencing, from early goals through installation, you can compare this roadmap with a more order-focused guide to kitchen renovation steps in order.
What makes a kitchen renovation feel seamless?
A smooth project is usually the result of clear decisions, accurate drawings and disciplined site coordination. The homeowner knows what has been selected. The contractor knows what has been approved. The site team knows what must happen before the next trade arrives.
Communication is just as important as craftsmanship. Regular updates help you understand progress, upcoming decisions and any site discoveries. Transparent documentation also reduces confusion about changes, payments and responsibilities.
Used well, the steps to kitchen renovation create a shared language between homeowner, designer and contractor. Everyone can see where the project stands and what must happen next.
Frequently Asked Questions
What is the first step in a kitchen renovation? The first step is creating a clear brief and initial sketch. Before choosing finishes, define how you cook, what storage you need, how the kitchen connects to nearby rooms and which problems the renovation must solve.
Should I choose appliances before cabinets are made? Yes. Appliance dimensions, ventilation needs and door clearances affect cabinet design. Built-in appliances should be confirmed before fabrication to avoid gaps, delays or costly changes.
Can I change the kitchen layout during renovation? Minor changes may be possible, but major layout changes become harder once rough-ins, cabinetry or countertop templating are complete. The safest time to refine the layout is during measured design, before demolition.
Do Dubai apartments need approval for kitchen renovation? Some apartments require approval from the landlord, developer or building management, especially for work involving plumbing, electrical changes, noise or common area access. Always confirm the rules for your specific building before work starts.
What should I check during the final inspection? Check cabinet alignment, countertop seams, plumbing, drainage, sockets, lighting, appliance operation, backsplash finish, paintwork and silicone lines. Create a written snag list so corrections can be completed clearly.
Ready to move from sketch to a finished kitchen?
A successful kitchen renovation needs more than attractive finishes. It needs careful planning, skilled trades, clear communication and a final inspection that protects the quality of the work.
Revo Craft Renovations helps Dubai homeowners and businesses transform kitchens with tailored design, expert craftsmanship and organized project management from the first idea to final handover.