
A strong interior transformation is not just about making a room look newer. The best interior design before after results solve a visible problem: poor light, awkward circulation, dated finishes, wasted corners, mismatched furniture, or rooms that never quite feel complete.
For Dubai homes and businesses, the difference between a simple refresh and a true transformation often comes down to planning. A space may need better lighting for long evenings indoors, durable finishes for family life, custom storage for compact apartments, or a warmer design language that balances modern luxury with daily comfort.
Below are practical before and after ideas that can dramatically change how a space looks, feels, and functions without relying on trends that fade quickly.
What Makes an Interior Design Before After Truly Transformative?
The most memorable before and after interiors usually share three qualities: the change is visible, the function improves, and the finished space feels intentional. A room can be beautifully furnished, but if the lighting is harsh, the layout is cramped, or storage is missing, the “after” will still fall short.
A successful transformation begins by identifying what is not working in the “before” stage. Is the room too dark? Does the furniture block movement? Are the walls plain but the floor already beautiful? Are the cabinets structurally sound but visually dated? These questions help you decide where to invest and where to simplify.
It also helps to plan renovation and styling together. For example, changing the wall finish before deciding the lighting temperature can lead to mismatched results. Similarly, ordering furniture before finalizing joinery may create awkward gaps or bulky corners. This is why many homeowners get better results when they treat design and renovation as one coordinated process, as explained in this guide on why home renovation and design work better together.
The Before and After Formula: Diagnose, Design, Refine
Before choosing colors or materials, break the room into three layers: structure, function, and atmosphere.
The structural layer includes walls, floors, ceilings, doors, windows, plumbing, electrical points, and fixed cabinetry. The functional layer covers layout, storage, seating, work zones, appliance placement, and circulation. The atmospheric layer includes lighting, color, texture, furniture, art, rugs, curtains, and accessories.
When the “before” feels chaotic, it is usually because these layers are not working together. The “after” should feel calmer because each decision supports the next.
| Before problem | Design move | After result |
|---|---|---|
| Dark room with one ceiling light | Add layered lighting with ceiling, wall, and accent sources | Warmer, more flexible atmosphere |
| Empty wall with no purpose | Add textured finish, shelving, art, or integrated storage | A focal point that feels designed |
| Cluttered living area | Introduce custom joinery and hidden storage | Cleaner space with better daily function |
| Dated kitchen cabinets | Reface, repaint, replace hardware, or remodel layout | Modern kitchen without unnecessary visual noise |
| Awkward furniture placement | Replan circulation and scale furniture correctly | Easier movement and better balance |
| Cold, plain interior | Add wood tones, soft textiles, and warmer lighting | More inviting and comfortable home |
Idea 1: Turn a Dark Room Into a Layered, Inviting Space
One of the most dramatic before and after changes comes from lighting. Many interiors rely on a single ceiling fixture, which makes the room look flat and creates harsh shadows. In Dubai apartments and villas, where daylight can vary depending on orientation and window treatment, a better lighting plan can completely change the mood of a room.
The “before” may show a living room that feels dim at night and washed out during the day. The “after” uses layers: recessed or track lighting for general brightness, wall lights or floor lamps for softness, and accent lighting to highlight artwork, shelving, or textured walls.
Warm white lighting often works well in living rooms and bedrooms because it creates a relaxed atmosphere. Cooler light can be useful in work zones, kitchens, utility areas, and bathrooms where visibility matters. The key is not to use one lighting temperature everywhere. Each area should support how the space is used.
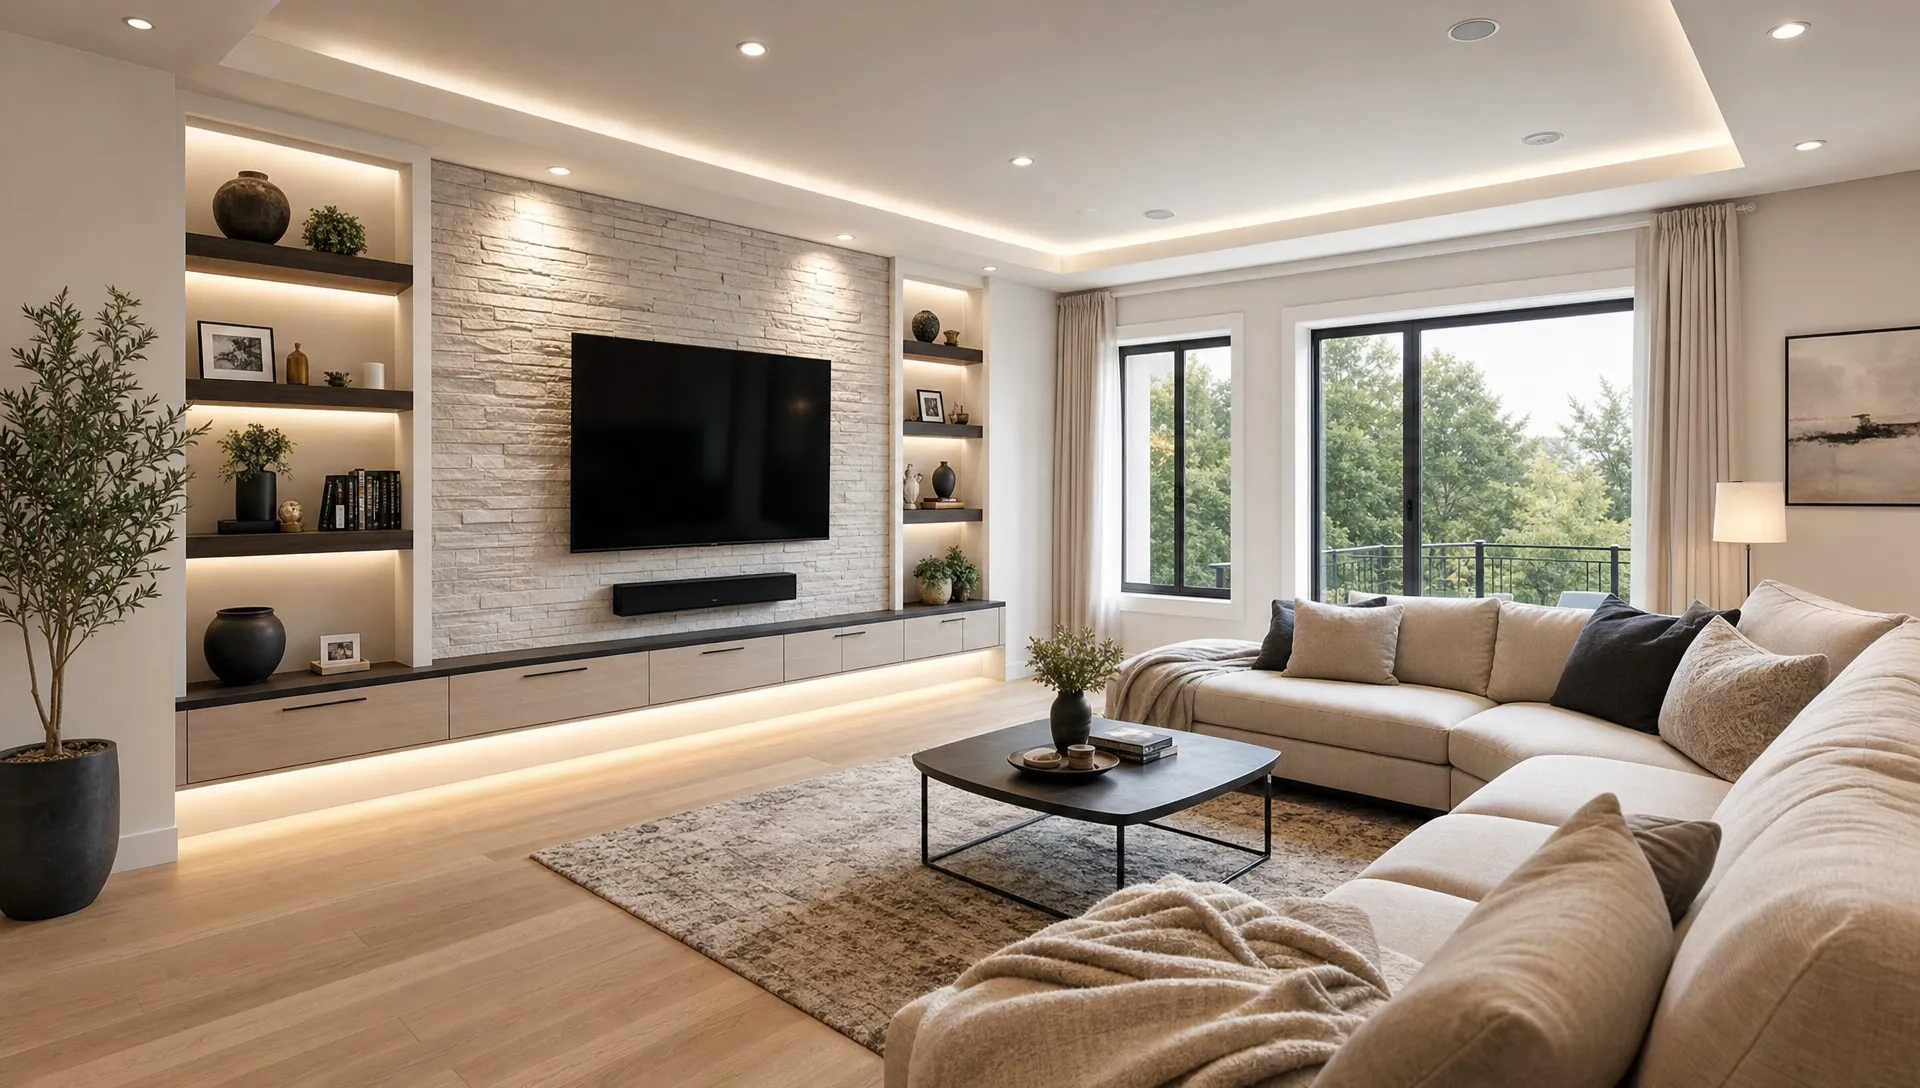
For a subtle but high impact result, consider lighting inside display shelves, under floating cabinets, or along a feature wall. These details make the after photo feel more premium because they add depth rather than just brightness.
Idea 2: Replace Blank Walls With Texture and Character
A blank wall can make a room feel unfinished, even if the furniture is expensive. In before and after interior design projects, walls often provide the biggest visual opportunity because they occupy so much of the room.
The “before” may be a plain white or beige wall behind a sofa, bed, reception desk, or dining table. The “after” could include fluted panels, microcement, decorative paint, wallpaper, stone effect finishes, timber details, or a carefully lit gallery wall.
Texture works especially well when the color palette stays calm. A soft taupe wall with a subtle finish can feel more sophisticated than a loud accent color. In modern Dubai interiors, this approach often creates a refined look that photographs beautifully while still feeling livable.
If you want a transformation without changing the whole room, choose one focal wall and build the design around it. Pair the wall finish with lighting, balanced furniture placement, and a limited number of decorative pieces. Too many competing features can make the “after” look busy instead of elevated.
Idea 3: Upgrade Storage So the Room Finally Works
Some interiors do not need more decoration. They need better storage. This is especially true in family homes, apartments, entryways, bedrooms, and home offices where everyday items quickly take over visible surfaces.
The “before” often includes loose cabinets, exposed shoes, overloaded shelves, visible cables, or furniture that was bought piece by piece over time. The “after” uses custom carpentry or built in joinery to create a clean, integrated look.
Good storage transformations are not only about hiding clutter. They can frame a TV wall, create a window seat, define a home office nook, or turn an unused corridor into a practical feature. Handles, panel profiles, wood tones, and lighting all influence whether the storage looks basic or premium.
For compact spaces, closed storage at the bottom and open shelving at eye level can keep the room from feeling heavy. For larger rooms, full height joinery can add architectural presence and make the space feel custom designed.
Idea 4: Transform a Dated Kitchen Into a Social Hub
Kitchen before and after projects are popular because the change is both visual and practical. A dated kitchen can make the entire home feel older, even if the rest of the interior is well maintained.
The “before” might include dark cabinets, tired countertops, poor task lighting, limited storage, or a layout that isolates the person cooking. The “after” may introduce brighter cabinetry, durable surfaces, under cabinet lighting, improved appliance placement, and a more open connection to the dining or living area.
Not every kitchen needs to be fully demolished. If the layout works, cabinet refacing, new handles, updated backsplash tiles, a modern countertop, and better lighting can create a strong transformation. If the workflow is poor, a more complete remodel may be worth considering because it can improve daily convenience as well as aesthetics.
For busy households, the most successful kitchen redesigns focus on movement. Cooking, cleaning, serving, and storage zones should feel intuitive. If the kitchen is the heart of your home, professional kitchen renovation services that transform busy homes can help align style with real household routines.
Idea 5: Make a Small Space Feel Larger Without Extending It
Before and after transformations do not always require adding square footage. In many cases, a room feels small because of visual interruptions, oversized furniture, poor lighting, or low contrast between functional zones.
The “before” may have bulky sofas, heavy curtains, dark flooring, or furniture pushed randomly against walls. The “after” can feel larger by using better proportions, lighter window treatments, wall mounted furniture, reflective surfaces, and a more consistent color palette.
A few design moves can make a noticeable difference:
- Choose furniture with visible legs to create a sense of openness.
- Use mirrors strategically to reflect light, not clutter.
- Keep flooring consistent between connected spaces.
- Replace heavy storage units with built in vertical storage.
- Use curtains that run from ceiling to floor to make walls feel taller.
The goal is not to make everything white. A room can use deep colors and still feel spacious if the lighting, furniture scale, and layout are well planned.
Idea 6: Create a Hotel Inspired Bedroom That Still Feels Personal
A bedroom transformation should feel calm, not staged. The “before” may include mismatched bedside tables, exposed wires, flat lighting, a bare wall behind the bed, or no clear design direction. The “after” should improve comfort first.
Start with the headboard wall. A full height upholstered panel, timber feature, wallpaper, or painted wall detail can frame the bed and instantly make the room feel designed. Add bedside lighting at a comfortable height and use switches that are easy to reach.
Soft furnishings make a major difference in bedroom before and after results. Curtains, bedding, rugs, and cushions add warmth and acoustic softness. In Dubai, where interiors often combine air conditioning, bright daylight, and hard finishes, these softer elements help the room feel more restful.
Storage also matters. A beautiful bedroom can quickly lose its appeal if wardrobes are poorly organized or surfaces are crowded. Built in wardrobes, concealed dressing areas, and customized drawer layouts can make the “after” easier to maintain.
Idea 7: Give Bathrooms a Spa Like Upgrade
Bathroom transformations can be some of the most rewarding, but they need careful planning because plumbing, waterproofing, electrical safety, ventilation, and material durability all matter.
The “before” may feature dated tiles, poor lighting, a basic mirror, visible pipework, or insufficient storage. The “after” can include large format tiles, a floating vanity, recessed niches, improved mirror lighting, matte black or brushed metal fixtures, and a calmer color palette.
Even smaller upgrades can change the feel of a bathroom. Replacing the mirror with an illuminated version, updating tapware, improving grout lines, and adding a wall hung vanity can make the room feel cleaner and more modern.
For a more premium result, avoid choosing every finish as a statement. If the tile has strong veining, keep the vanity simple. If the tapware is bold, let the wall finish stay quiet. Balance is what makes the after photo feel timeless.
Idea 8: Use Interior Styling to Finish the Transformation
Many before and after interiors look incomplete because the renovation ends before styling begins. Paint, flooring, lighting, and cabinetry create the foundation, but styling gives the room personality.
The “before” may be structurally improved but visually empty. The “after” adds rugs, curtains, artwork, cushions, plants, vases, books, and decorative objects in a controlled way. These items should not feel random. They should echo the room’s colors, textures, and proportions.
A useful styling rule is to repeat materials in small doses. If the room has walnut joinery, use a timber tray or side table. If the hardware is brushed brass, repeat that warmth in a lamp or picture frame. If the sofa is neutral, add contrast through cushions or artwork rather than repainting the whole space.
For more upgrade inspiration beyond before and after transformations, explore these interior renovation ideas that instantly elevate a home.
Before and After Ideas by Room
Different rooms need different transformation strategies. A great living room after photo may depend on furniture scale and lighting, while a kitchen transformation may rely more on workflow and finishes.
| Space | Best before and after focus | High impact upgrades |
|---|---|---|
| Living room | Comfort, focal point, lighting | Feature wall, joinery, layered lighting, better sofa scale |
| Kitchen | Workflow, storage, durability | Cabinet upgrades, countertops, backsplash, task lighting |
| Bedroom | Calm, storage, softness | Headboard wall, wardrobes, curtains, bedside lighting |
| Bathroom | Cleanliness, comfort, water safe finishes | Vanity, tiles, mirror lighting, fixtures, niches |
| Entryway | First impression, organization | Shoe storage, mirror, console, wall finish, lighting |
| Home office | Focus, ergonomics, cable control | Built in desk, shelves, task lighting, acoustic softness |
| Commercial space | Brand impression, customer flow | Reception feature, durable finishes, lighting, custom counters |
Common Mistakes That Weaken the Final “After”
A before and after transformation can lose impact when design decisions are made in isolation. One of the most common mistakes is choosing finishes before understanding lighting. A paint color that looks warm in a showroom can look dull under the wrong bulbs.
Another mistake is focusing only on what appears in the photo. A beautiful living room still needs enough sockets, practical storage, comfortable seating, and easy cleaning. Good interior design is not just visual. It should support daily life.
Scale is another issue. Oversized furniture makes a room feel crowded, while tiny furniture can make a large room feel unfinished. Measure carefully before buying, especially for sofas, dining tables, rugs, beds, and TV units.
Finally, avoid copying an inspiration image exactly. Your room has its own ceiling height, daylight, layout, and lifestyle needs. Use references to clarify mood and direction, then adapt the design to your space.
How to Plan Your Own Interior Design Before After Project
Start by taking honest before photos from multiple angles. Capture the room in daylight and at night. Photograph storage problems, awkward corners, old finishes, and any areas that feel uncomfortable. These images help you see the room more objectively.
Next, define the transformation goal in one sentence. For example: “We want this living room to feel brighter, calmer, and easier for family gatherings.” A clear goal prevents the project from becoming a collection of unrelated upgrades.
Then separate must haves from nice to haves. Must haves may include electrical upgrades, plumbing changes, custom storage, or replacing damaged finishes. Nice to haves might include decorative lighting, accessories, or premium wall treatments.
Once the scope is clear, coordinate materials, lighting, carpentry, and installation timing. This is where professional project management can protect the final result. When trades are sequenced properly, the finish is cleaner and the process is less stressful.
Frequently Asked Questions
What is the most effective interior design before after idea? Lighting is often the most effective starting point because it changes how every color, texture, and piece of furniture appears. For a deeper transformation, combine lighting with wall finishes, storage, and layout improvements.
Can I get a dramatic before and after result on a limited budget? Yes. Focus on high visibility upgrades such as repainting, lighting, cabinet hardware, curtains, feature walls, and decluttering through better storage. You do not always need a full renovation to create a strong visual difference.
How do I choose which room to transform first? Start with the room that affects your daily life the most. For many homeowners, that is the living room, kitchen, bedroom, or bathroom. If you plan to sell or rent the property, prioritize areas that influence first impressions and functionality.
Do before and after interior projects always require custom carpentry? Not always, but custom carpentry can make a major difference when storage, awkward dimensions, or a built in look are important. It is especially useful for TV walls, wardrobes, entryways, kitchens, and compact apartments.
How long does an interior design transformation take? It depends on the scope. Styling and small upgrades may be completed relatively quickly, while projects involving carpentry, wall finishes, electrical work, plumbing, or full remodeling require more planning and coordination.
Ready to Create a Before and After Worth Sharing?
A truly transformative interior design before after is not about changing everything. It is about changing the right things in the right order, with a clear plan for how the space should look, function, and feel.
Revo Craft Renovations helps homeowners and businesses in Dubai create tailored interior transformations with thoughtful design, quality finishes, custom solutions, and coordinated project execution. If your space has potential but needs expert direction, start with a personalized consultation and turn your “before” into an after that feels beautifully complete.